Lync 2013 RTM Build Number / Version Number

December 22, 2012

I have just deployed Lync 2013 RTM, which is available for Technet and MSDN subscribers, i was wondering that the Lync 2013 which i have downloaded and deployed is really RTM or have i deployed Preview version, Also how to dertermine Lync 2013 RTM build or version number and what is Lync 2013 RTM build or version number, I couldn’t find the proper document in TechNet or any where else except http://lyncdup.com/2012/11/known-minor-issue-lync-server-2013-rtm-powershell-help-still-references-lync-2013-preview/

So i thought that i should also post here for other Lync guys out there who wants to confirm. Lync 2013 RTM version number is 5.0.8308.0.

To confirm that your Lync 2013 environment is RTM or not do the following

Open Lync 2013 Management Shell type Get-CSServerVersion you will find the answer below

Image

You can also run Get-CsManagementStoreReplicationStatus from Powershell in which you will see Prodcution Version

UpToDate           : True
ReplicaFqdn        : lync2013-fe.contoso.local
LastStatusReport   : 20.12.2012 15:00:11
LastUpdateCreation : 20.12.2012 15:00:08
ProductVersion     : 5.0.8308.0

Also Open Lync 2013 Control Panel note that

Image

Have Fun

Lync Mobility Step by Step in Split Domain Name Part II

February 21, 2012

In second part of this series we will talk about publishing rule in TMG for Lync Mobility, we will also go through some trouble shooting steps which we will face during connecting Lync mobile Client.

Let us publish Lync Mobility using TMG

In my scenario i already have one rule which is created for Lync Services, in this TMG rule i have not enabled port 80 because all of my lync simple urls are published through 443. Keep in mind that for Lync discovery i have not added any SAN names in my external certificate, however DNS Entry in external DNS is there, which is why i will publish lync services over port 80. As per my understanding i can use the same Lync firewall rule to publish lync mobility only three things needs to be changed one is to allow port 80 from outside and allow port 8080 from TMG to hardware load balacner, add lync discover name under public name in the same rule. So let’s go ahead and edit the existing lync rule.

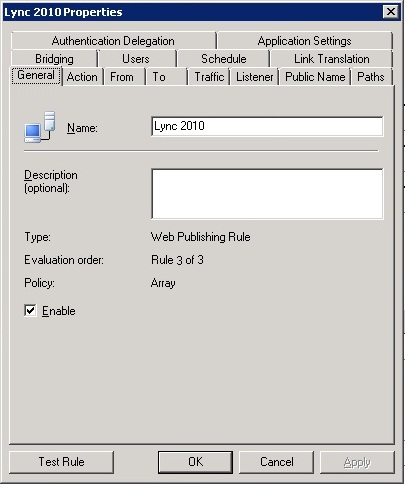
Go to the TMG double click existing Lync rule,

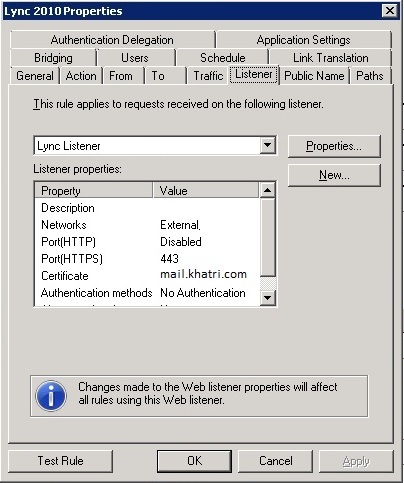
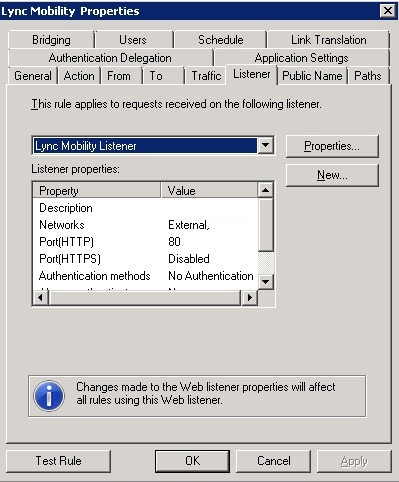
on the Lync 2010 Properties click on the Listener tab on the litsener tab notice that port HTTP is shown as disabled and notice that Certificate CN is mail.khatri.com which means we are using only once certificate for exchange and Lync. on the Listener tab click Properties

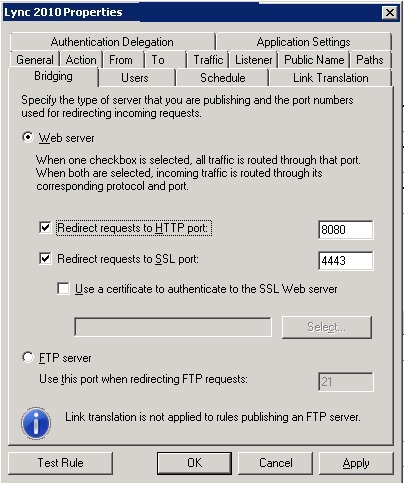
on the Listener properties page click on Connection tab then select Enable HTTP connections on port make sure that port 80 is defined autoamtically if not type 80 and then click on and then ok, you will be redirected to Lync 2010 Properties page. On the Lync 2010 properties page click on Bridging tab, on Bridging select Redirect request to HTTP ports and then type 8080

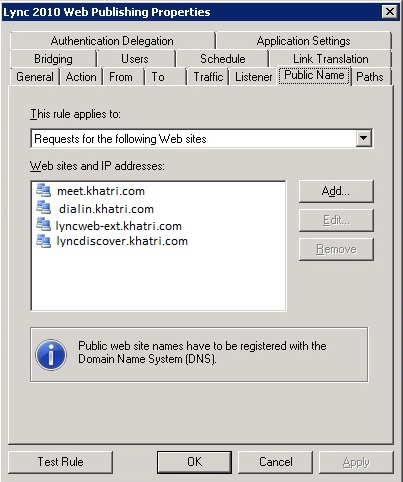
Once done then click on public name tab and then add lyndiscover.khatri.com then click ok.

we are done with the publishing rule. let’s take a mobile which is windows phone or android or iphone install Lync client on it then try to connect. First connect to your mobile to company wifi once it is done then connect your mobile to 3g or gprs then again try to connect.

I have connected my iphone on my internal wifi, tried to connect Lync Mobile client it is not connecting but throwing error that could not verify server please contact system administrator, ok which means it can not find the automatic discovery of my lync autodiscover site, lets add server values instead of connecting using Auto Detect. open the Lync Mobile client click more Details find Auto-Detect server option then switch this option to off. Once this option is switched to off you will have two entries Internal Discovery Address and External Discovery address, type lyncdiscoverinternal.khatri.com under internal Discovery and lyncdiscover.khatri.com under external discovery address then sign in again. This time Lync client stucks on keep signing in, i gave it 10 minutes but no error even no time out error. So what is the problem why it is not connecting internally. Let’s try to connect from outside, switch to GPRS connection and the try but this time turn on the option Auto-Detect Server, This time it gave me error can not verify server certificate, but why, am i publishng my Lync mobility on port 443 ofcourse not i am publishing on port 80 then why it is trying to get the certificate.

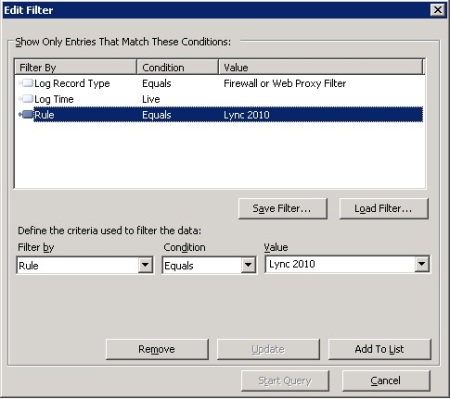
Let’s go to the TMG logging option to see weather request is coming to TMG or not and if request is coming then what exactly the error is on TMG, Open TMG console on the left pane click on logs and reports on the middle pane under tasks click Edit filter on the Filter page click on Filter by option then select Rule, on the contains option click on Equals, on the value page select Lync 2010 rule then click on update

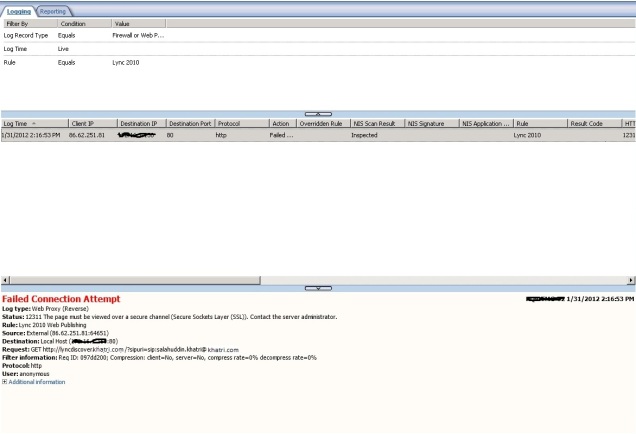
you will be redirected to Logs and reports page, Ok so now we told TMG that when ever some one tries to connect and hit on this rule show all results, now let’s go ahead and try to connect again from outside and keep an eye on TMG i have got same error on Lync client and found some thing weired in TMG results

Which means we are going to TMG to connect but TMG is saying that request should come with HTTPs not with HTTP. what i have done wrong here i mean how to tell TMG or Lync that i dont want lyncdiscovery over HTTPs there is no way over here. This has forced me to read whole technet documents related to Lync Mobility because you can not find alot of info every where except Technet. In the Technet i have found out that even if you are creating http or https autodiscover request you have to create a new firewall rule. Well that makes sense, let’s delete what ever addition we have done on the existing Lync 2010 firewall rule and then create a new rule dedicated for Lync Mobility. you can find more info related to this on this website http://technet.microsoft.com/en-us/library/hh690030.aspx

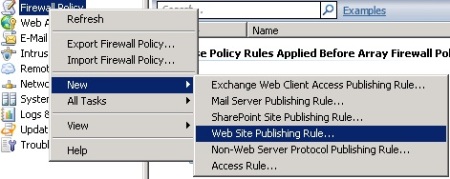
Open TMG console right click on firwall Policy then click New and then Website Publishing Rule

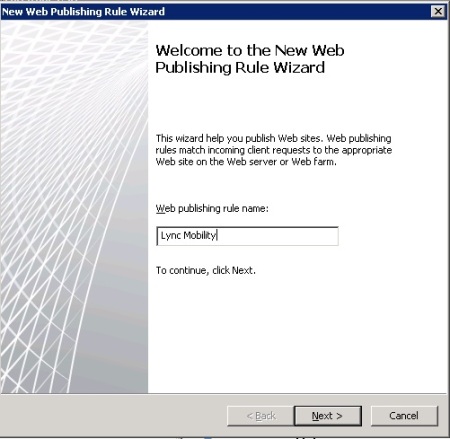
on the Welcome Page under Web Publishing Name type Lync Mobility click Next

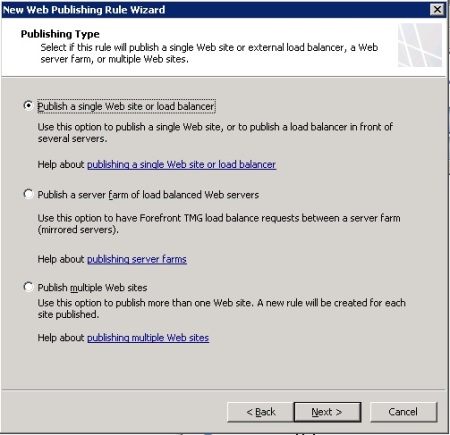
on the Select Rule Action click Allow then click Next, on the Publishing Type page select Publish a Single website or Load balancer click Next

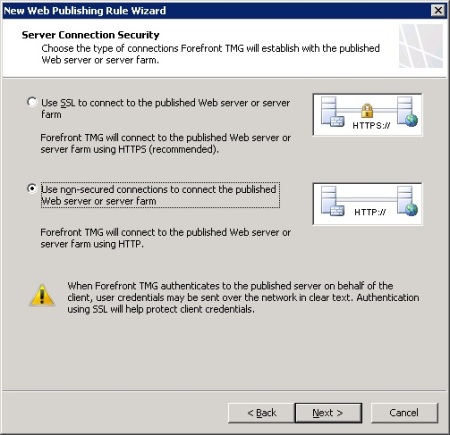
on Server Connection Security page click Use non secure connection…… then click Next (if you are publishing secured then you have to select first option)

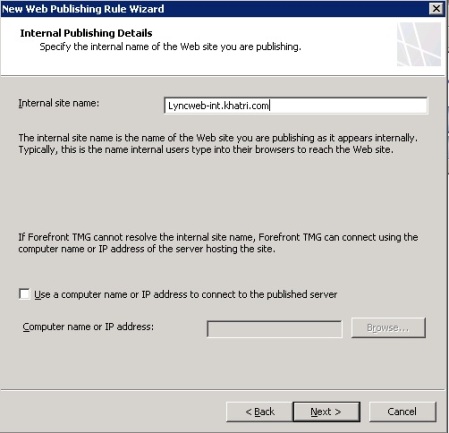
Under internal site name type lyncweb-int.khatri.com then click Next (this is the Lync url with which address book downloads, which points to HLB)

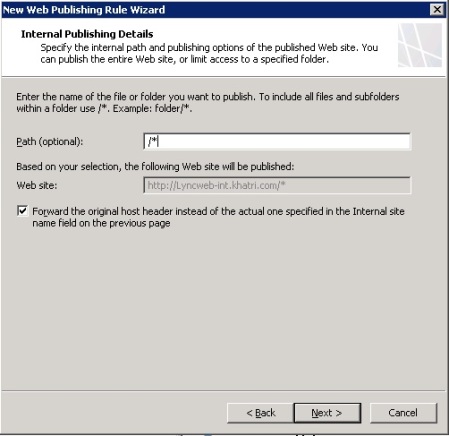
on the Internal Publishing details under path (optional) type /* also make sure you have selected foward the original host header …. then click next

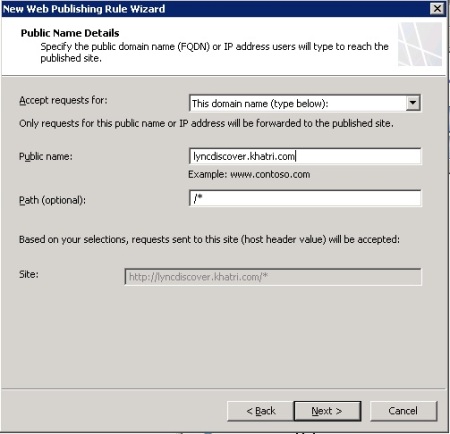
on Public name details type lyncdiscover.khatri.com then click Next

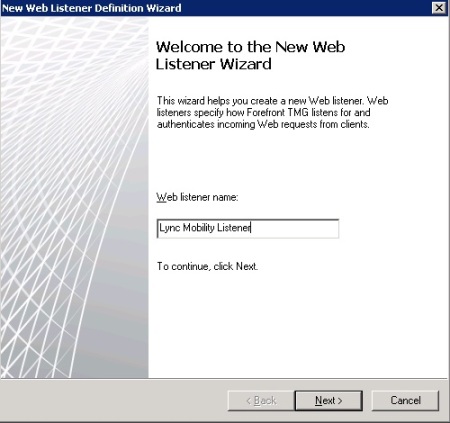
on the select Web Listener click New (as we can not utilize the existing Lync Web listner because that one is being used as HTTPs). on the name type Lync Mobility Listener then click Next

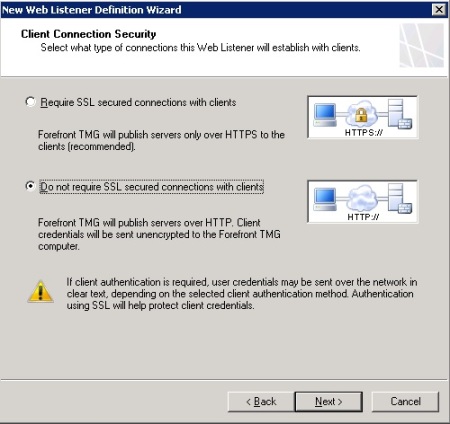
on client Connection Security select Do not require SSL secured connections click next

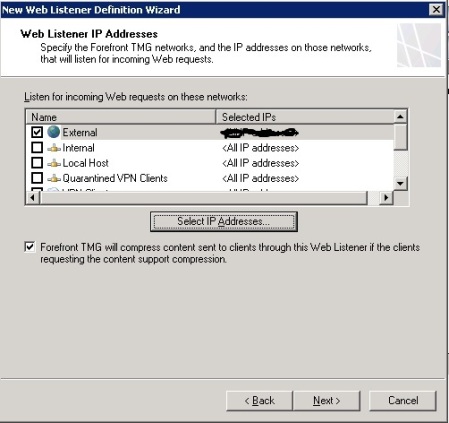
on the Select Web Listener IP Address click on External and then select the IP address which is dedicated for Lync Web Services. This is the same IP which is being used for dialin.khatri.com, meet.khatri.com and lyncweb-ext.khatri.com, as these are published on port 443 whic is why we can use same IP for port 80. In my case i am not giving public IP instead i have NAT public IP with the IP which is on the external interface of TMG. As we have TMG NLB in which external and internal both interfaces are NLB thats why i have added Lync NAT IP in the TMG External NLB IP, you can also add as much IPs as you want in to the NLB ip so that specific requests can come to that ip.

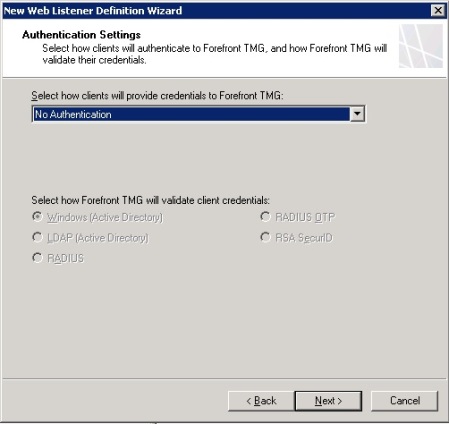
on the Authentication Settings page select No Authentication then click Next and then next and then Finish here you will be taken to the mail Firwall rule

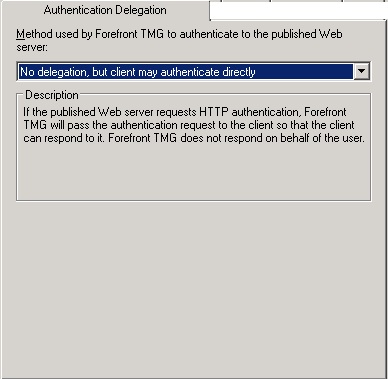
On the Listener page click Next on the Authentication Delegation click on No Delegation but Client can authenticate Directly then click Next and Finish

Double click on the created rule then click on Listener then click Properties

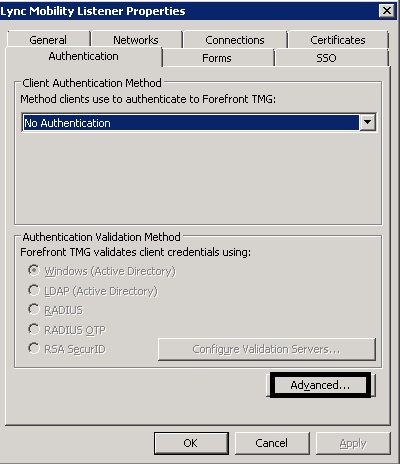
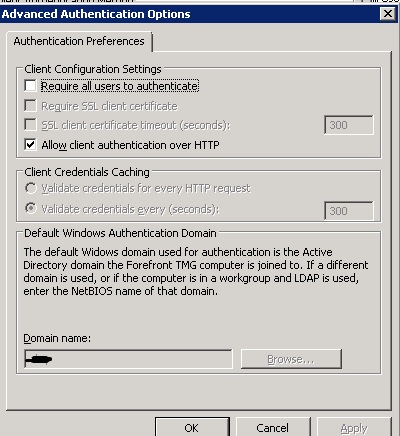
now click on Authentication tab then click on Advanced

on the Advanced page click Allow client authentication over HTTP click OK OK we are done.

Let’s go ahead and connect Lync Mobile client over internet by connecting gprs or 3g or wifi of your home or Company Guest wifi which goes outside company network but doesn’t route to your company internal network. I have connected my Iphone and voila it connected like a charm. it is working perfectly fine. Now the problem is why Lync Mobile client is not connecting from itnernal network by the way good question :). Ok let’s try again but this time let’s enabl logging on the Lync Mobile Client which will give all logs related to Lync Mobile client. Now the question is how to enable Lync Mobile Client logging.

Guys i am tired i think i have to write Part III for Lync Mobile Connectivity internally. Mean while enjoy Lync Mobile Client Connecitivity from outside.

Lync Mobility Step by Step in Split Domain Name Part I

February 15, 2012

I was trying to find out the Lync Mobility service step by step deployment guide along with the Publishing rule for TMG but couldn’t find any where except how to install MCX and Autodiscovery Service, some how i found one or two blogs out there for Lync mobility service publishing. How ever i came across alot of problems which made me think and forced me to read Technet articles (I love to read technet because you will not find alot of things else where except Technet) to understand the whole concept of Mobility. In this two part article you will be able to understand the Lync mobility, how to deploy and how to make it work internally and externally. Please read the whole Blog before you deploy.

Prerequisites:

You must have Microsoft Lync 2010 Enteprise or Standard Edition up and running, don’t think that you are going to install Lync Mobility service on any server without having Lync binaries installed 😛

Internal PKI should be deployed

If planning for external client connectivity add another SAN name (lyndiscover.khatri.com) in third party certificate, how ever you can publish lync mobility on port 80 which doesnt require External Certificate

Create A records in External and Internal DNS

Lync Cu4 must be installed on Lync FE Servers

For those who might be worried about the down time during Lync Mobility deployment, No there is no down time required

Overview of Deployed Lync Servers

Ok before moving ahead let me introduce you about my environment, about DNS A records and IP addresses so that i dont have to mention each and every thing again and again

1. One Domain Controller name DC1 and Domain name is khatri.com

2. Two Lync Front End Servers Enterprise Edition, Server names are QHQ-Lyncfe-01 and QHQ-Lyncfe-02

3. one Hardware Load Balancer which is being used for client to server and server to client https requests

4. Meet.khatri.com, admin.khatri.com, dialin.khatri.com are simple urls for the lync pointing to the Hardware Load Balancer, IP is 10.0.0.200

5. Lync pool name is lyncpool1.khatri.com which is DNS load balancing towards the lync servers

6. Lync interrnal URL is lyncweb-int.khatri.com pointing to the hardware load balancer

7. Lync External URL is Lyncweb-ext.kahtri.com published through TMG and there is no A record in inetrnal DNS

8. All simple urls A records are created in internal DNS as well as in External DNS how ever admin.khatri.com is not published publically which is why there is no A record for admin.khatri.com in external DNS and there is no A record for lyncweb-ext.khatri.com in internal DNS

9. i have split brain dns configuration in my environment which means inside the domain and outside the domain both DNS name are same. for example my Domain name is khatri.com and my url which are published outside are also khatri.com

10. one TMG EMS Array means three servers one acting as EMS and two as managed array. TMG is joined to the domain, having two interfaces one connected internally another connected externally, windows NLB is installed and configured.

Create A records in internal DNS and External DNS

Before installing Lync Mobility services we will have to create A records for Lync mobility in internal and External DNS. While deploying Lync Mobility service it doesn’t ask that which name you would like to use for Lync Mobility which is why we are forced to use following A records

1. lyncdiscoverinternal.khtri.com (Cname or A record in internal DNS)

2. lyncdiscover.khatri.com (Cname or A record in External DNS)

Open DNS management Console in internal DNS server and create the Cname record pointing to the lyncweb-int.khatri.com. Send email to your external DNS provider so that they can create cname record for lyncdiscover.khatri.com pointing to lyncweb-ext.khatri.com or if you have DNS console in your hand create it by your self.

Run Commands on Lync FE servers

Logon to QHQ-LYNCFE-01 open Lync Management by right click and select Run As Administrator on Lync Power Shell write the following commands, the first command is for internal litsening port, remember the port can be any litsening port which is free
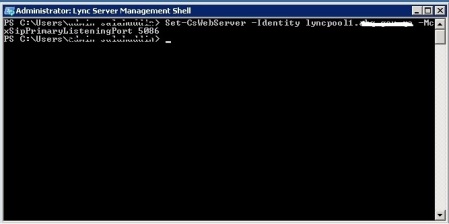
now type another command for external service
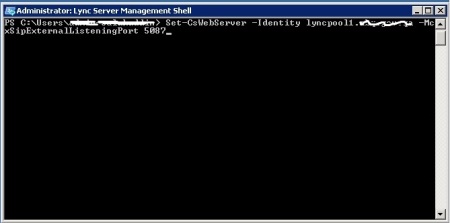
Once done publish the topology by running enable-cstopology -ver. After successfully publishing the topology we have to install some IIS features which is required by Lync Mobility. In the Lync management shell type Import-Module servermanager and press enter (there will be no output so dont worry). Now type following commands to install IIS features required by Lync Mobility service (as i have Windows 2008 R2 SP1 i do not have to do any changes on ASP, but those admins who have Lync installed on Windows 2008 with latest SP review the technet article http://technet.microsoft.com/en-us/library/hh690016.aspx because you have to do some manual changes).
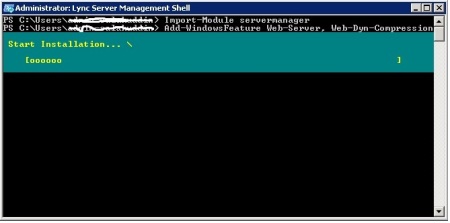
Remember if you have two Lync servers do the above on both Front End Servers. As all commands and prerequisites are satisfied go to  http://www.microsoft.com/download/en/details.aspx?id=28356 to download MCXStandalone.msi (Do not double click and install downloaded MSI)  copy MCXStandalone.msi file to C:\ProgramData\Microsoft\Lync Server\Deployment\Cache\4.0.7577.0\Setup
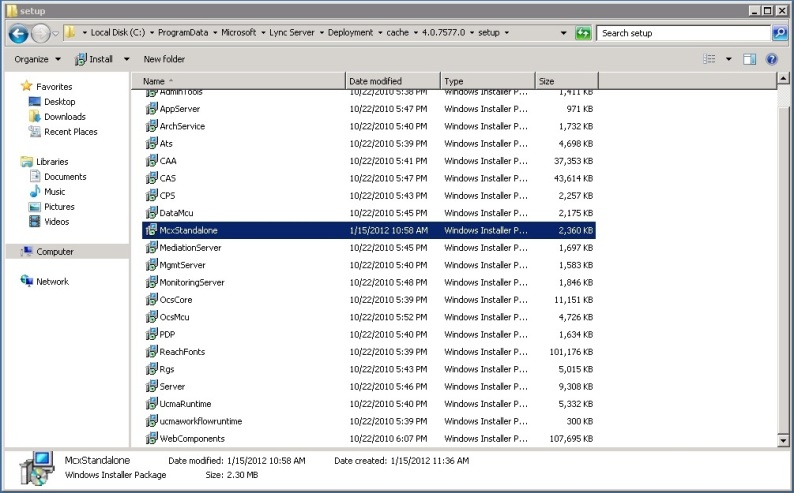
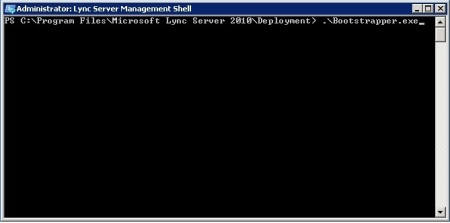
Now go back to the Lync Management Shell then explore to the path C:\Program Files\Microsoft Lync Server 2010\Deployment then type bootstrapper and press Tab key from keyboard, this command will look in to updated files in the above folder if it finds some thing it will install that msi, in our case we have copied MCX file in to the cache in this case it will only install new msi file found in cache,
Following will be the output
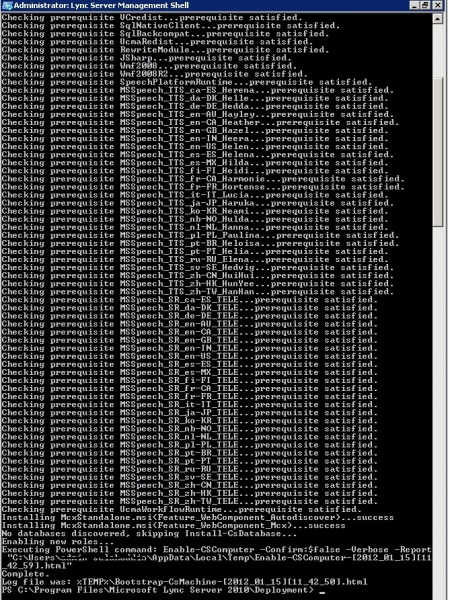
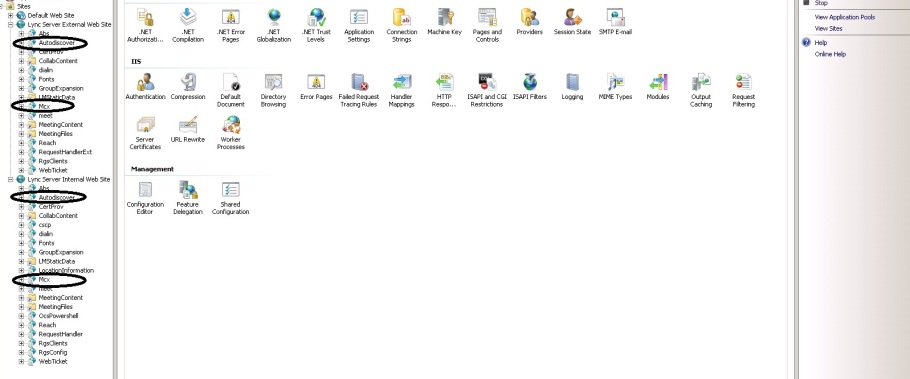
Once the above will be successfully open log files which is given in the above output to make sure that every thing has been installed successfully. There is another way to make sure that it is successfully done, open the iis manager console from the FE server you will find two virtual Directories (Do this on both FE servers if you have two FE SERVERs) 
We will have to update the internal Certificate so that users will not get any certificate errors. Remember if you are publishing lyncdiscover over TLS you have to add SAN name in your third party certificate which have meet and dialin urls. Following procedure should be done on all cases doesnt matter you are trying to publish lyncmobility service over TCP or over TLS.

Update Lync Internal Certificate

On the Lync Front end server open Deployment wizard then select Install or udpate Lync Server System
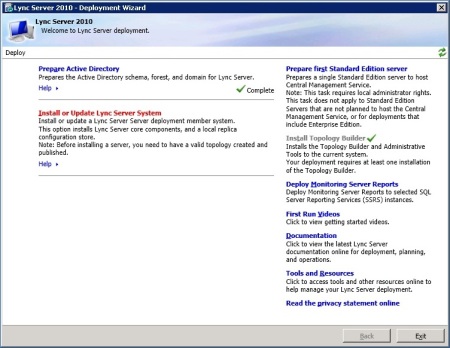
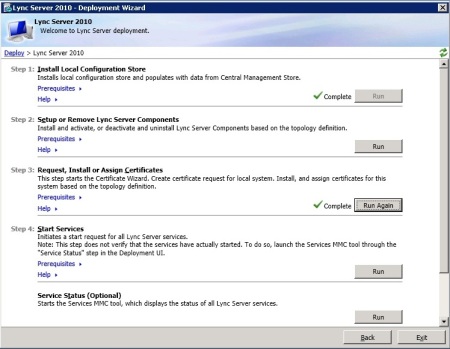
Now click on Run Again for Request, Install or Assign Certificate
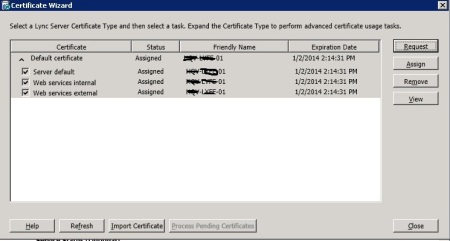
on the Certificate Wizard click on right hand side click on Request
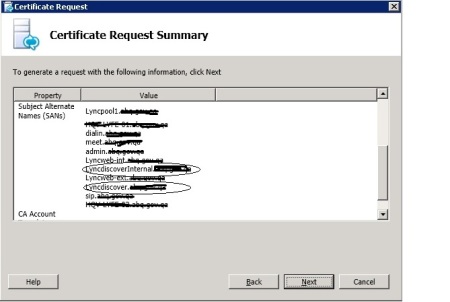
on the first page click Next, on the second page select Send the request immidiately to an online certificate authority click Next (here online doesnt mean that it will go to verisign or digicert or any third party certificate vendor, it will go to internal pki to send the request and get the certificate automatically), on the Choose a Certificate Authority make sure your Internal CA is selected which is responsible for certificates then click Next, go through the Wizard based on your infrastructure untill you reached to the summary page, where you will see two names which are added automatically, lyncdiscoverinternal.khatri.com and lyncdiscover.khatri.com then click Next
once the request is successful click Next
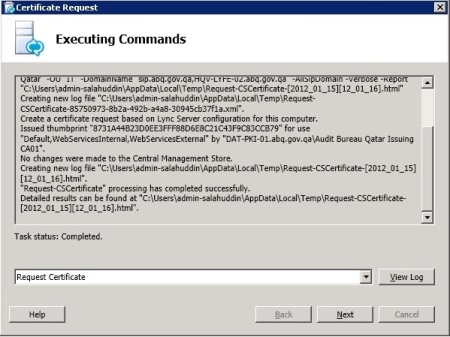
on the Online Certificate Request Status clilck Finish
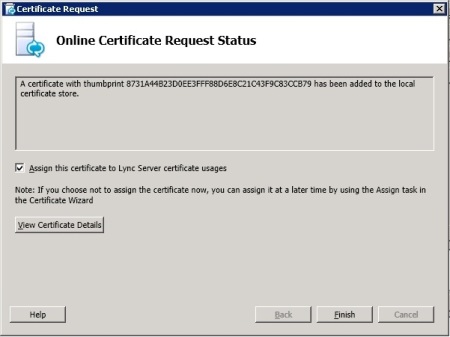
On the Certificate Assignment click on View Certificate to make sure that it is a new Certificate then click Next, on the Summary page click Next, on the executing commands click Finish make sure that assignment is successful, by clicking on view Summary. Go to the event viewer and look in to the events about certificate has been successfully assigned, Remember you don’t need to restart any Lync service.

There are some more commands to do the federation with office online to fetch notifications for Iphone and windows phone, i don’t need this which is why i will not go to those steps. At this time i thought i would connect my windows phone or iphone to my wifi and then voila but it was not the case. You might will get the error that cannot verify server certificate and you might also get that can not find the server error. We will go through all of this in part 2 and 3.